Magic Mirror Using Surface RT
Ever since I saw Michael Teeuw’s Magic Mirror project, I’ve wanted to make my own.
The idea is simple: place a monitor behind a one-way mirror and write software to drive a personal Heads-Up Display. Maybe place it in your bathroom to view the weather and your schedule while getting ready in the morning. Maybe place it in your foyer to read and share notifications when getting home.
To get started, I wanted to keep the budget and hardware to a minimum. I might eventually go all-out and embed a full monitor and PC, but I preferred to start small.
First Attempt: Mirrored Window Film
Besides the monitor and PC, the biggest cost for this project comes from the one-way mirror itself. When first looking in 2014, I couldn’t find custom-sized one-way mirrors online. The best options I found were >$250 each.
Naively, I figured that I could simulate a mirror by using a mirrored window film. You know, the cling-wrap some people use for privacy on their first-floor windows. So I ordered the window film, application spray, found a squeegee, and went to work.
It went horribly.
First, it was difficult to cut straight lines to get it to the right size. Worse, window films are hard to apply perfectly on large surfaces. They work fine in small window panes, but the larger the application, the more bubbles and creases tend to appear. If you mis-apply and have to lift a wet section, it can fold or stick to itself. After that, it never looks good again.
Toni and I eventually got it applied, put it in the frame, and tried putting a screen behind. It looked terrible. Cheap, too opaque, and just overall distorted. Oh well, that idea’s down the drain.
Current Attempt: One-Way Acrylic
I was fortunate to see this post in my Reddit stream a few weeks ago. User “olipayne” pointed out the precise custom-order acrylic one-way mirrors from TAP Plastics. A little pricey at ~$150, but worth trying in my opinion.
I picked out my picture frame, measured it twice, and ordered. Within a week, the most important part of my magic mirror arrived and fit the frame perfectly.
An important decision to get started with my mirror was to skip a full monitor. Very few monitors are flat enough to fit behind a frame and even fewer have the HDMI ports mounted in the right orientation. I wasn’t ready to try taking a monitor apart. And even if I could get it to fit, I didn’t want to have a PC dedicated to this display.
(Un)fortunately, I had an unused Surface RT that I could dedicate to the project. On a side note, it’s amazing how quickly the RT became obsolete. While a full-size display would be ideal, I figured I could include fit some pertinent KPIs in the tablet-sized corner of the mirror. I’d turn it on when needed and unplug it, going into hibernation when away.
I wanted to keep the frame’s backing, so I had to cut a Surface-sized opening for it. Those boards are surprisingly thick! Thankfully, my Dremel tool made short work of it.
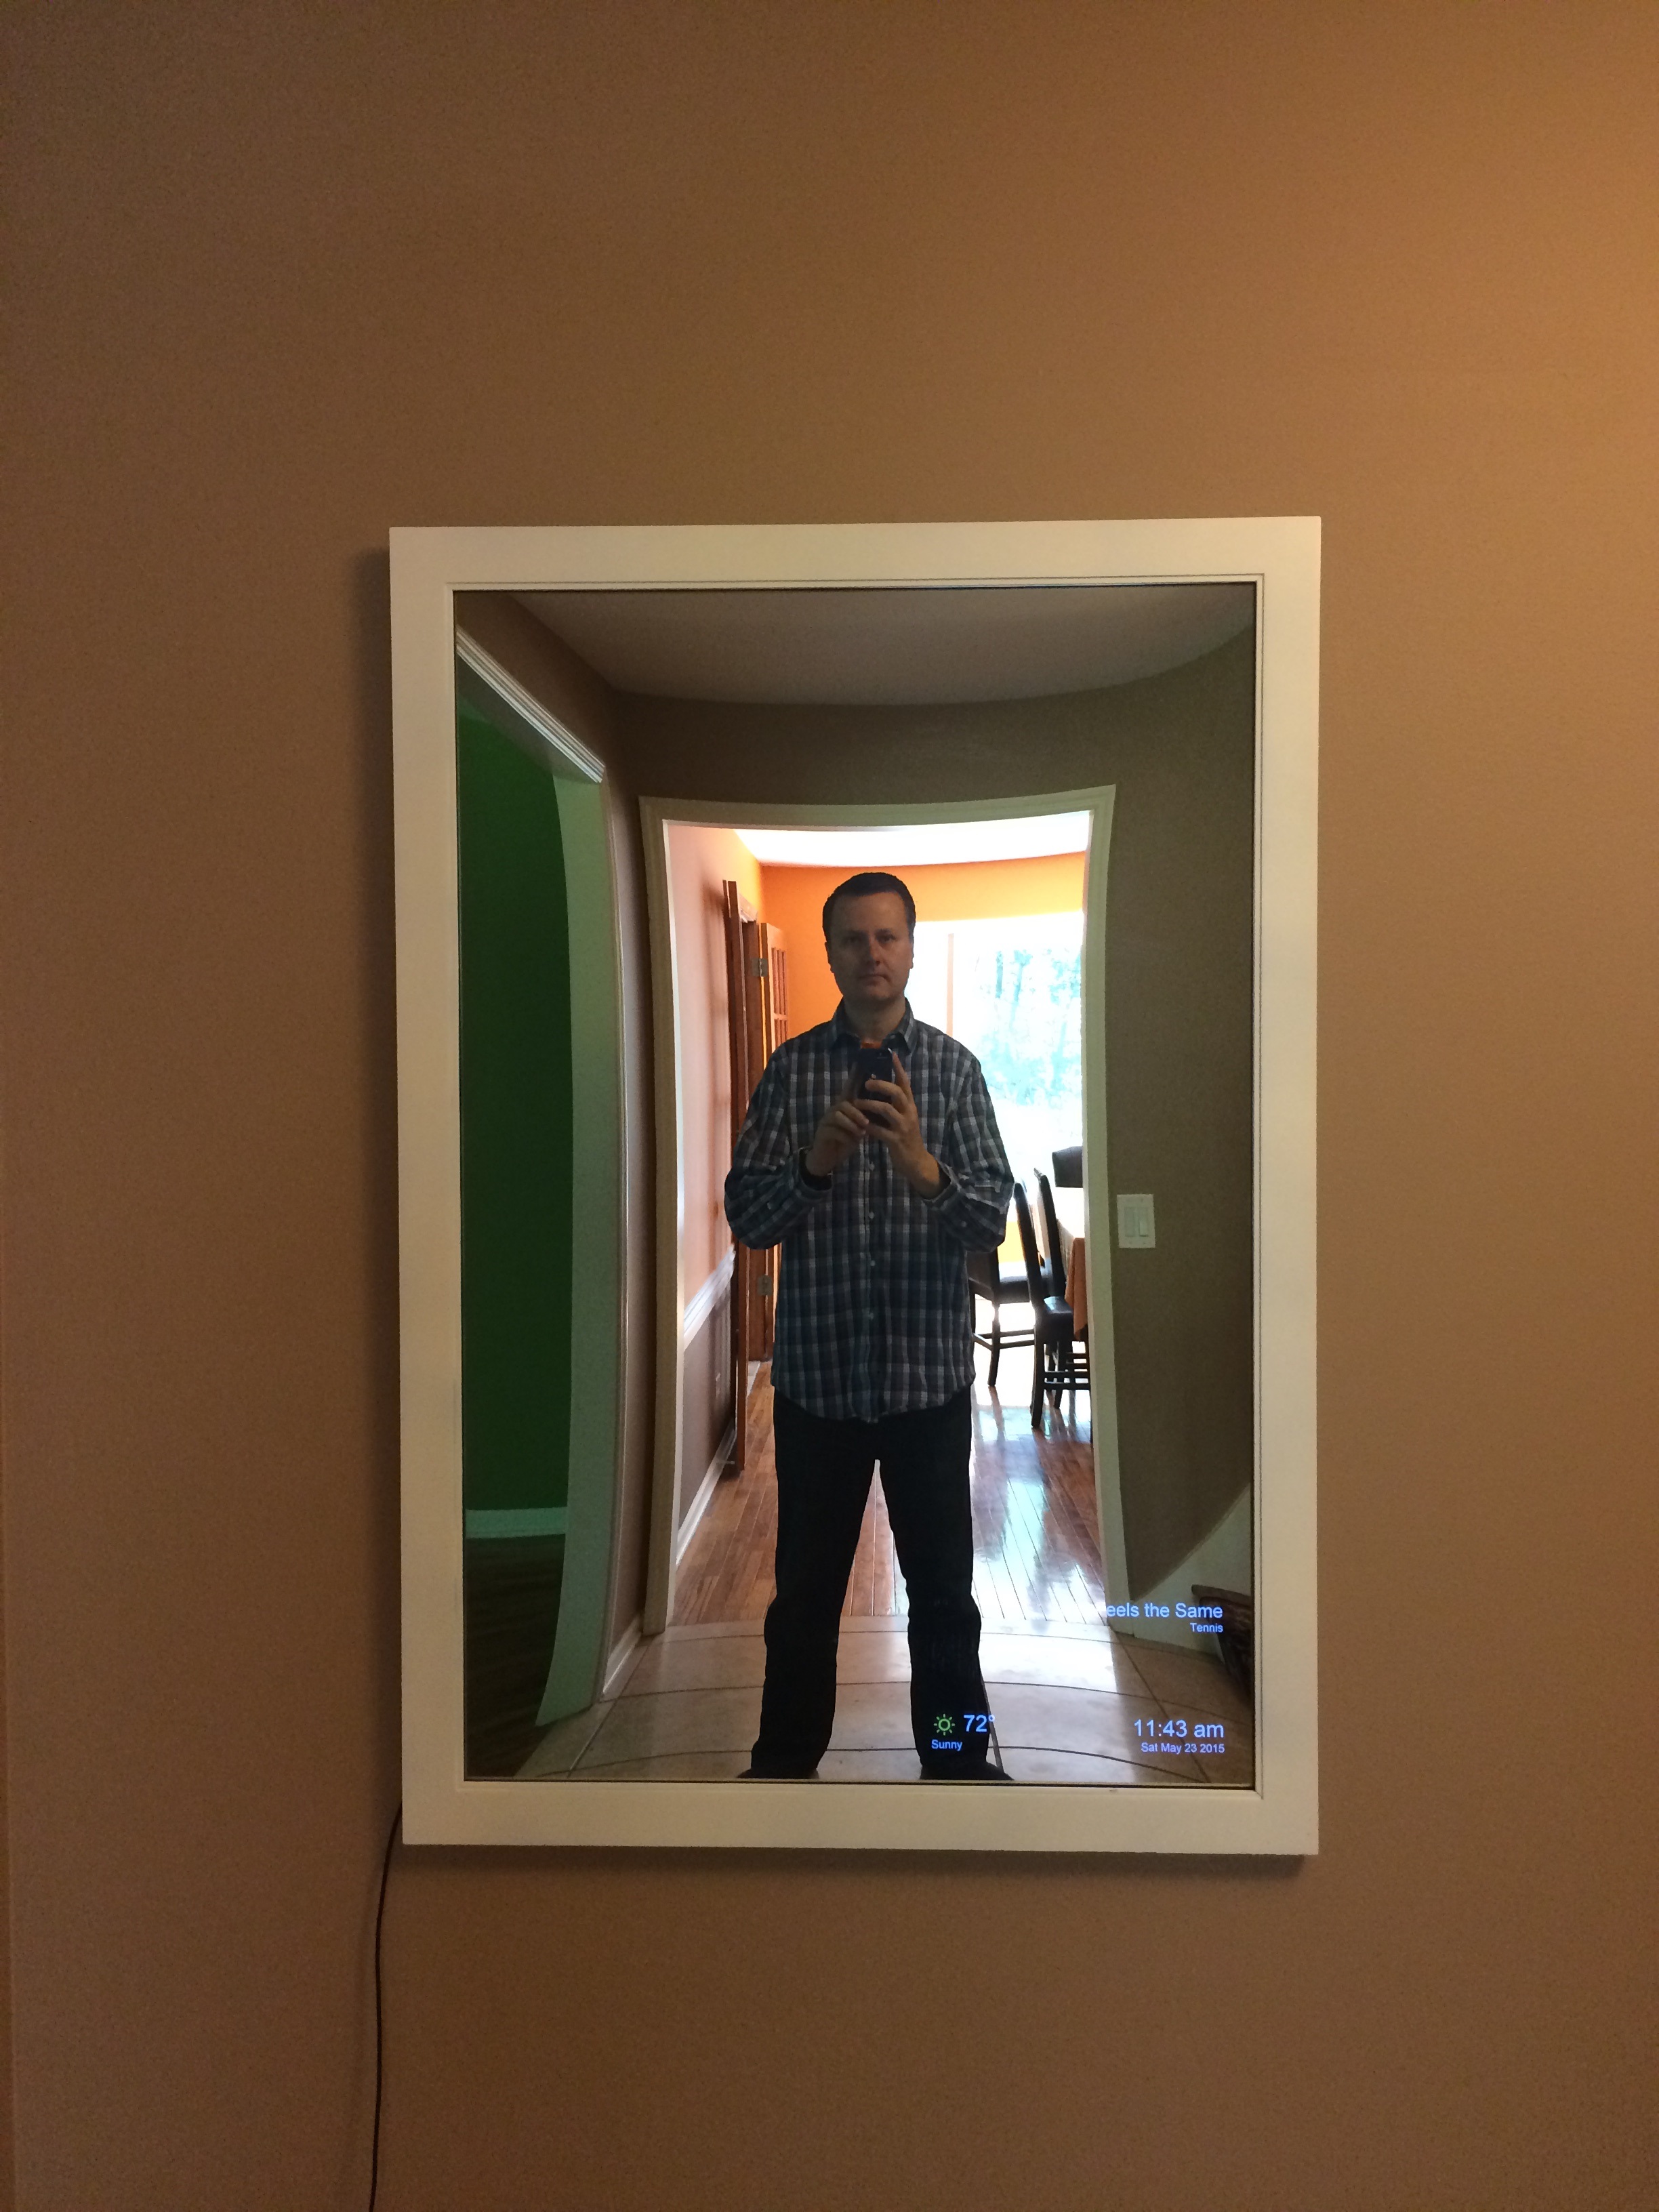
Before I knew it, I had the mirror in the frame and the Surface fit perfectly. Turn on the screen, put it on the wall, and… Whoa, the mirror looks warped. Is this a circus mirror?
While I’m very happy with the one-way acrylic from TAP Plastics, it did arrive slightly curved. And it turns out that the mirror and frame backing isn’t as thick as most art that you frame, so there was plenty of wiggle room allowing the acrylic to flex. We placed cardboard between the backing and the mirror (cut from the shipping materials), which made the whole display sturdier, but it still flexed outward.
That’s led to an unappealing convex bubble in the middle, distorting subjects from the middle outward. That’s as far as I’ve gotten from a hardware standpoint.
How’s It Look?
Could be much better, but you can see the concept here.

The photo above was taken mid-day, where the glare makes white text hard to read. You can notice the distortion right away. We had friends over for a barbecue Saturday and everyone quipped about the “funhouse mirror”.

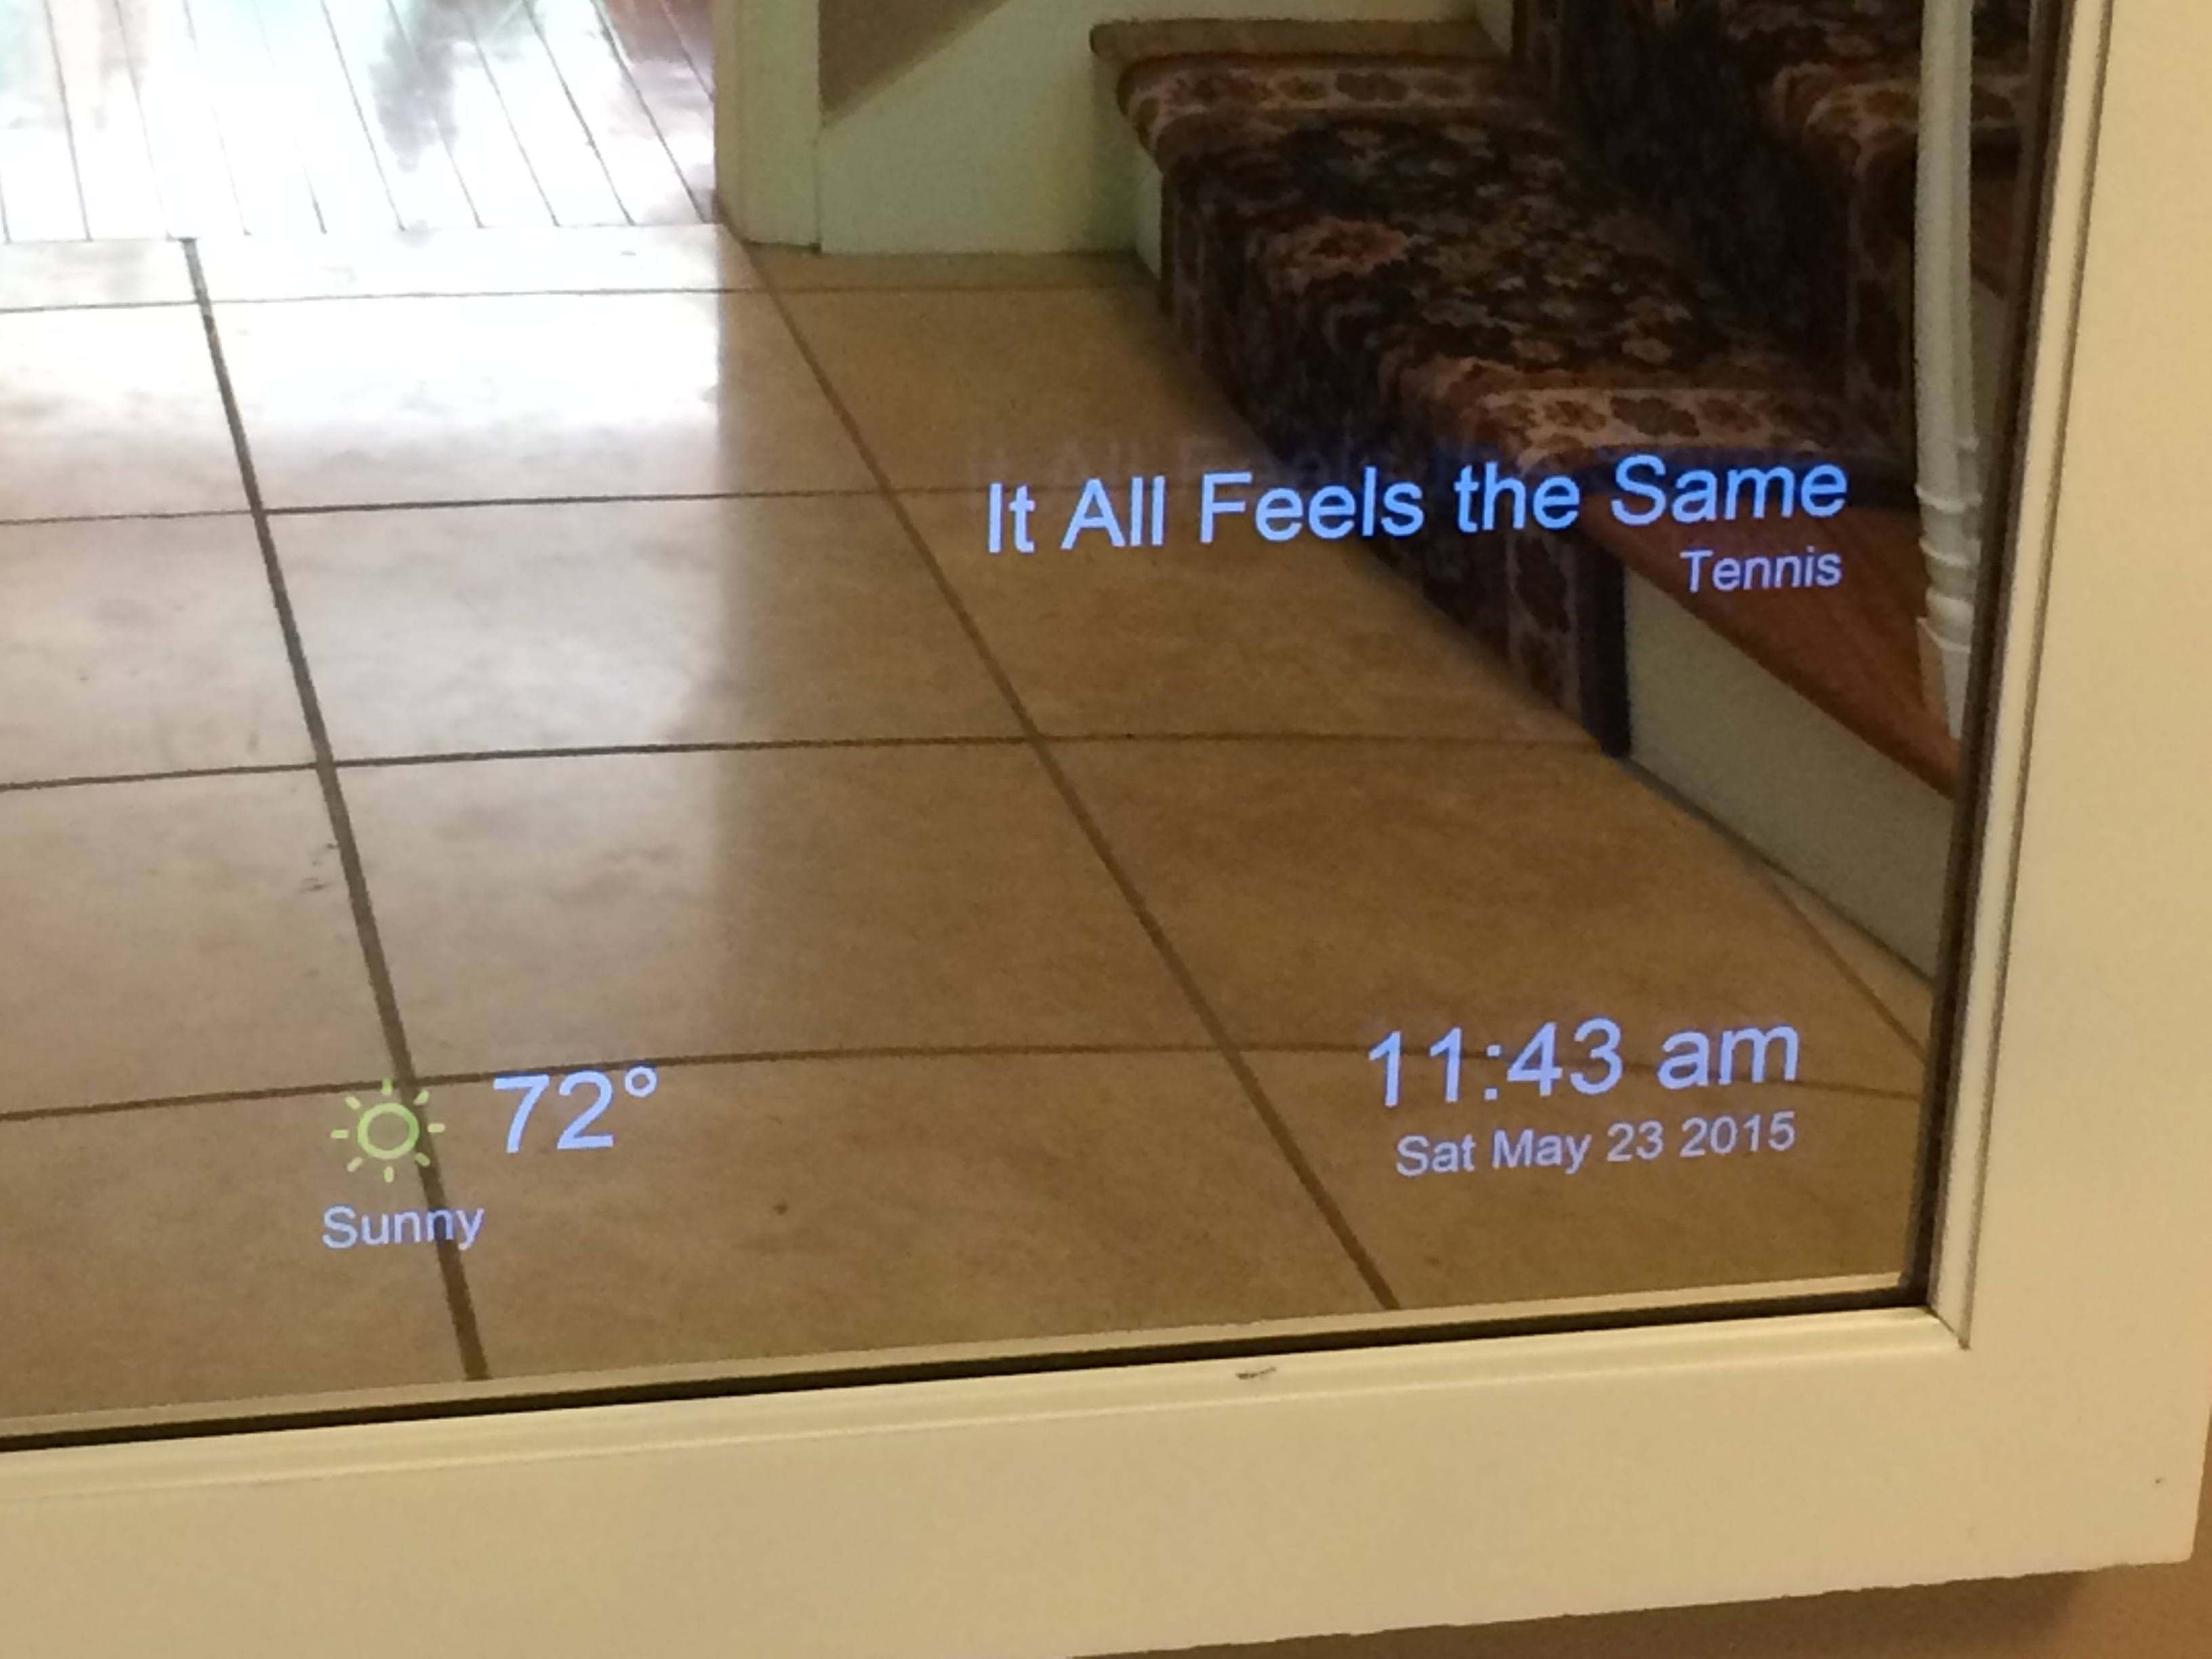
Here’s a zoomed-in glimpse of the Surface display at the bottom corner. As you can see, the display blends in fairly well. It’s pretty rare that the background glow is noticeable. While a bit small, the Surface RT works great as a backing display.
The Software
I haven’t spent much time on the dashboard UI for the display. I set up IE 11 on the surface to display in full-screen by default and set its homepage to my custom ASP.NET MVC site. For weather, I make a JavaScript call to OpenWeatherMap’s REST API. Music is pulled through a .NET SOAP wrapper for Sonos I wrote a few years ago. That portion is creaky and due for an update.
Next Steps
If this is going to stick around, we’ll need to eliminate the mirror bowing. I’m planning to take out the cardboard layer and try putting the glass pane back on the surface, constraining the mirror like most artwork. I’m concerned it will still be distorted, but can’t get much work.
Frankly, I’m not sure this looks good enough to be on display in the foyer. Maybe I continue after this is moved to the basement, although it’s far less useful there. It doesn’t look great to have a frame with a random wall wart and power cord dangling below.
To make this more practical, the display should only turn on when needed. To accomplish that, I could set up a geo fence or beacons so that my phone turn it on or off. The “RT” can’t run universal apps, but other tablets would allow native code to add more control. Maybe I’d set it up so the camera monitors and turns the screen on only during motion. Maybe a Leap Motion or Kinect could be configured for “Minority Report”-style swiping control. It’d be pretty fun to swipe left or right to change the song and swipe up or down to adjust volume.
From a software standpoint, I’d like to add my schedule using Exchange Web Services and pull my current Fitbit step count using their API.
Right now, everything’s too tightly coupled. I may start an open source project for personal dashboards and make it easy to enroll personalize data sources using OAuth. We’ll see.